Friday, May 10, 2013

Honey Bun Cake ~ again

Tomorrow we are going to Cincinnati to a funeral, which of course is a sad event. On the other hand, it is always pleasant to see all the Florians and Lechlers in one spot.  They are completely devoted as a family.  Andy and I will go to Joe and Glenda's before the funeral, so I have baked for the 8th and 9th time the honey bun cake. One for here on Mother's Day and one for Glenda's Mother's Day. This simple easy cake is so delicious that it has no right to be so simple to make...but simple it is AND delicious it is. I think I have surely given you the recipe long ago on this blog, but I insist on giving it again because I don't want you to miss this treat. I thought I had gotten this recipe on The English Kitchen blog, but now on the reprint it reads 'honey bun cake.doc-Google Drive.  I don't think anyone has the right to get his/her nose out of joint when someone uses 'their' recipe, otherwise, don't put it in a blog or on the Internet. There are sets and sub sets of recipes using the same ingredients over and over and I don't think anyone 'owns' the recipe.

Honey Bun Cake

1 box yellow cake mix
4 eggs (I use 5)
1 cup sour cream
3/4 cup packed light brown sugar
2 teaspoons cinnamon
2 cups powdered sugar
6 tablespoons milk
1 teaspoon vanilla extract

Spray 13x9 baking dish with nonstick spray.In a medium bowl using a mixer stir together the cake mix, eggs, sour cream, and oil and mix until well-incorporated.

In a separate bowl, mix together the brown sugar and cinnamon until well blended; set aside. Pour half of the cake batter into a greased 13x9 pan, spreading the batter out into a thin layer. Add all of the brown sugar/cinnamon mixture (I also use pecans) to the top, covering the entire layer of batter. Pour the rest of the cake batter on top and spread the batter until the cake is even.  Then take a knife and use it to make figure 8 patters to make the cinnamon mixture meander through out the cake.

Place the cake in the oven and bake for 40-45 minutes depending on your oven.

While the cake bakes, make the glaze of powdered sugar, milk and vanilla. When the cake comes out of the oven pour the glaze on right away.
Signed Brandie--so I guess this is her recipe with the copyright 2011-2012  sigh...
Thank you Brandie, it's a winner.

I went on line again and there are dozens of honey bun recipes and pictures with the same ingredients and different looks including a bunt pan look.  Here are three pictures.  Mine has the darker glaze because of the vanilla in the glaze.

Honey Bun Cake. Photo by gailanng

Tuesday, May 7, 2013

Good ideas ~

I like this stove!


 Waaaaa, I want this stove.

We had this Mother's Day with steaks smothered in mushrooms.  This is a quick and delicious side.

Bacon, Avocado and Corn Salad


Bacon, Avocado and Corn Salad


Yield: 6 small servings

Prep Time: 10 min

Cook Time: 15 min

Ingredients:


5 strips thick-cut bacon
4 large ears corn, husks and silks removed
1/2 cup crumbled feta or cotija cheese
2 tablespoons chopped fresh cilantro
juice of 1 lime
1 large Hass avocado
coarse salt and freshly ground pepper, to taste

Directions:


1. Place a heavy skillet over medium heat. Arrange the bacon strips in the skillet and cook on both sides until the bacon is crisp, 5 to 6 minutes. Transfer to a paper towel-lined plate to dry. Remove all but 1 tablespoon of the bacon fat from the skillet.
2. Cut the kernels off each cob by laying the cob flat on a cutting board and using a sharp knife to remove the kernels. Discard the cobs and transfer the kernels to the skillet with the bacon fat. Cook the corn over medium-high heat until it is just slightly golden brown, about 5 minutes. Turn off the heat, crumble in the cheese, and add the cilantro and lime juice. Let the mixture cool to room temperature. Roughly crumble the bacon into the corn mixture and toss to combine.
3. Cut the avocado in half lengthwise. Remove the pit from the avocado and discard. Remove the avocado from the skin, and cut the avocado into 1/2-inch pieces. Transfer the avocado to the skillet and toss.
4. Taste and season with salt and pepper before serving. Serve immediately at room temperature, or refrigerate for later. Bring to room temperature before serving.


This makes way more sense than dragging an ironing board out:    Quilted ironing board with magnets for the top of the dryer! -- no more wrestling with the ironing board! Since most of my ironing is flat, this is a good idea for me.
 
 
if we ever have a beach houe
Perfect for a beach house.
Loading AnimationI think that's my chair right beside yours!
 
I think that's my chair right beside yours, Glenda... next month. Oh, and a new puzzle too.


I'm thinking about doing our shutters with this French blue. I have French blue accents in the back yard, but not in the front. (I've thought about it for years, actually, but have never dared do it.)


Photo
 
 
Photo

Displaying collections
Photo
Photo


The hardest thing about collecting is how to display your ware without looking like a flea market or junk yard.
 
Photo
Photo
Things that twine...


Photo

Photo


Photo


This is a little busy...but there you have it.


Photo
hankies... have to do this!
Souvenir spoon holder for vintage hankie collection...good idea!vintage monogrammed linenshankies                                                            
Beautiful French embroidered linens.French vintage linens
                 
                                                                               Photo

Photo

Pinned Image      


Beth and I will be organizing my linen closet next. It will be good to shake and refold my mother's quilts that she and Aunt Fausta worked on together. I understand you should unfold and refold (change the fold) antique quilts at least once a year.


Saturday, May 4, 2013

Pinterest Means You'll Never have to Buy another Cookbook ~

Since the guys are working in the yard today, and lunch is ready for them, I've been perusing Pinterest...the place with all the recipes you can ever make. It not only has recipes, but activities and collections galore.  It is entertainment without leaving your computer chair. These presentations are mostly from the real housewives and husbands of America. Every once in awhile they mention Barefoot Contessa, or Everyday Food, but they have likely made some sort of adjustment to the original recipe. Here are some recipes and ideas from my Pinterest time today.(Just in case you are too busy to ferret out the good stuff.)

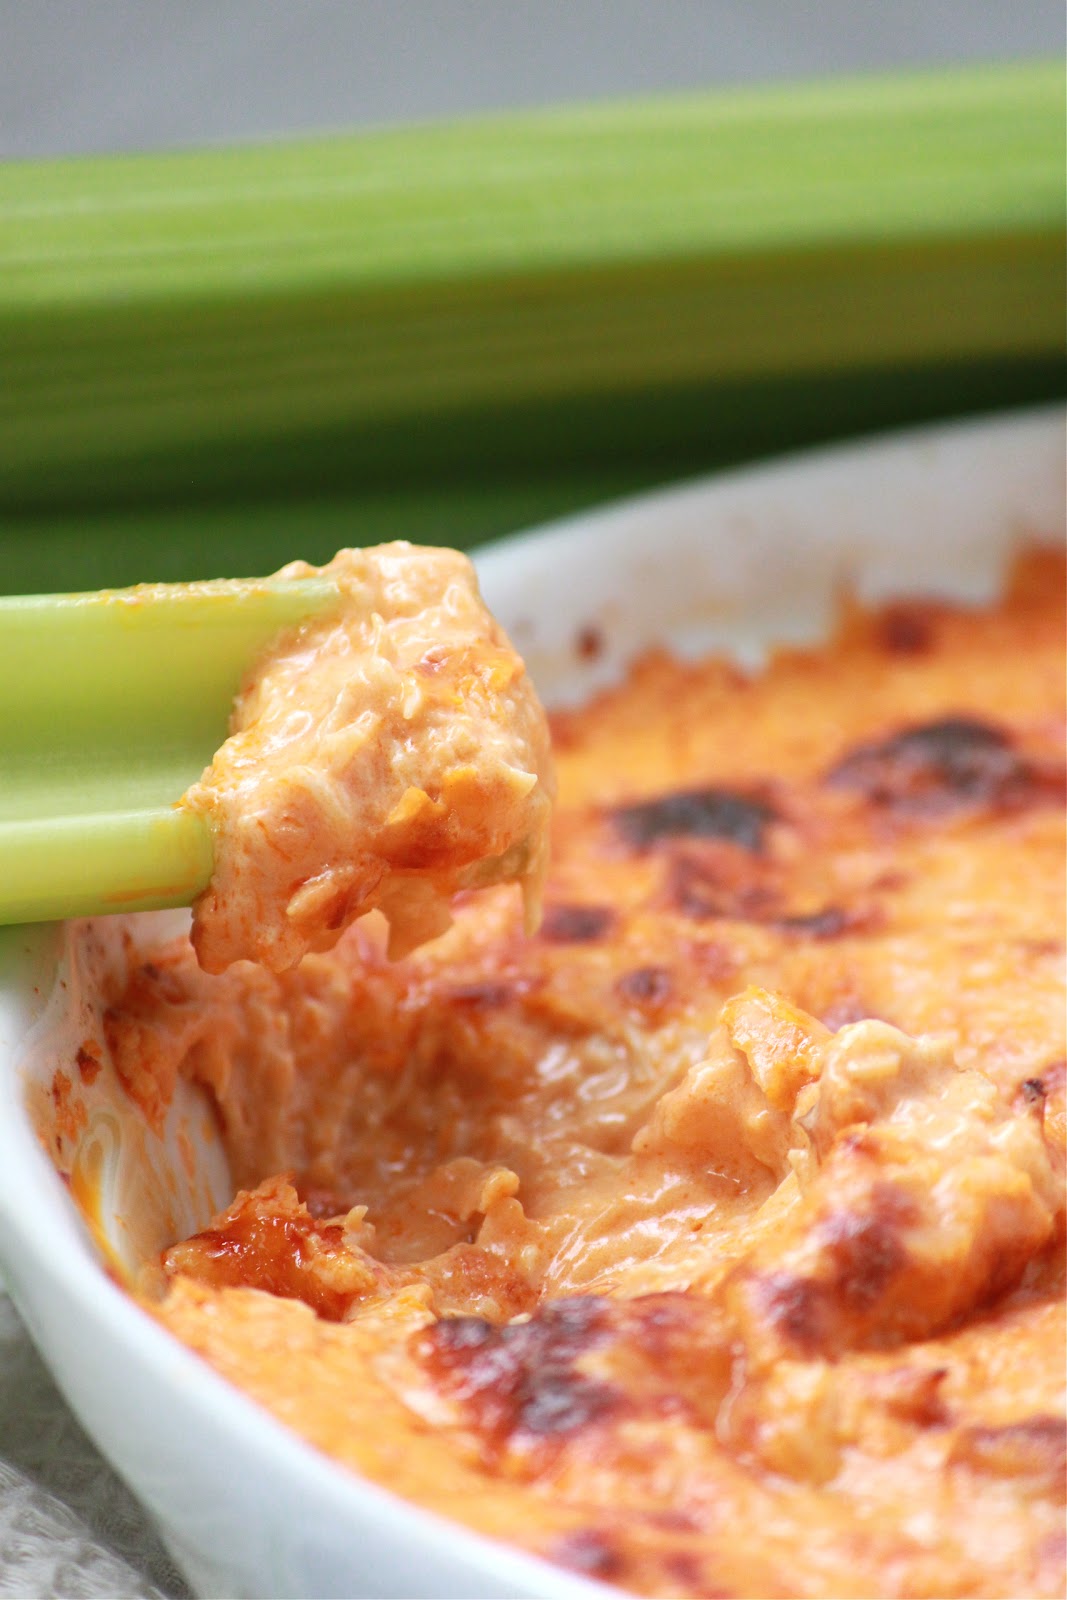
Spicy Chicken Buffalo Dip
8 oz. (one package) cream cheese, room temperature
1/2 cup chunky blue cheese dressing
1/2 cup Frank's Red Hot sauce
1/2 cup shredded mozzarella cheese
1/2 cup shredded cheddar cheese
24 oz. shredded chicken  (You could use canned chicken breast, but I used rotisserie. )

  1. Heat oven to 350 degrees.  Lightly coat a baking dish with nonstick cooking spray and set aside.
  2. Place room temperature cream cheese in a bowl and whip until smooth.  
  3. Mix in salad dressing, hot sauces and mozzarella until well blended.  
  4. Stir in shredded chicken and mix until well incorporated.  
  5. Pour into baking dish (I used a pie pan) and bake for 20 minutes.  
  6. Turn on broiler and let top brown for an additional 4 minutes.  Remove and serve warm.
Serve with celery, pita chips, or bagel chips. 
 
Broccoli Cauliflower Casserole - This creamy casserole can be made a day ahead, refrigerated and then baked just before dinner. Using frozen vegetables makes this dish a cinch. 
 
Broccoli Cauliflower Casseroleoriginal recipe: http://www.mccormick.com/Recipes/Vegetables/Broccoli-Cauliflower-Casserole.aspx

Ingredients:
  • 1/2 cup plain dry bread crumbs
  • 1/4 cup plus 2 tablespoons grated Parmesan cheese, divided
  • 2 tablespoons butter, melted
  • 1 1/2 teaspoons McCormick® Perfect Pinch® Italian Seasoning, divided
  • 1 package (16 ounces) frozen broccoli florets, thawed I used fresh vegetables.
  • 1 package (16 ounces) frozen cauliflower florets, thawed
  • 2 tablespoons butter
  • 1 large onion, chopped (1 cup)
  • 2 tablespoons flour
  • 1 teaspoon McCormick® Garlic Salt
  • 1/4 teaspoon McCormick® Black Pepper, Coarse Ground
  • 1 1/4 cups milk
  • 4 ounces (1/2 package) cream cheese, cubed

Instructions:

1. Preheat oven to 350°F. Mix bread crumbs, 2 tablespoons of the Parmesan cheese, 2 tablespoons melted butter and 1/2 teaspoon of the Italian seasoning in small bowl. Set aside. Cut up any large broccoli or cauliflower florets into bite-size pieces.

2. Melt 2 tablespoons butter in large skillet on medium heat. Add onion; cook and stir about 5 minutes or until tender. Stir in flour, remaining 1 teaspoon Italian seasoning, garlic salt and pepper. Add milk; cook and stir until thickened and bubbly. Add cream cheese and remaining 1/4 cup Parmesan cheese; cook and stir until cream cheese is melted. Add vegetables; toss gently to coat. Spoon into 2-quart baking dish. Sprinkle top evenly with crumb mixture.

3. Bake 40 minutes or until heated through and top is lightly browned.
 
 
Getting off at the tube station in London, I always liked the treat of their cheese Danish. I figure it could not be too hard to make and this recipe reminds me of those times of antiquing.


Ingredients:
2 cans ready to use refrigerated crescent rolls
2 8-ounce packages cream cheese
1 cup sugar
1 teaspoon vanilla extract
1 egg
1 egg white

Glaze:
1/2 cup powdered sugar
2 Tablespoons milk
1/2 teaspoon vanilla extract

Method:
Preheat oven to 350* degrees and grease a 13X9-inch baking pan. Lay a pack of crescent rolls in the pan and pinch the openings together. Beat the cream cheese, sugar, vanilla, and egg together until smooth. Spread the mixture over the crescent rolls evenly and then lay the second pack of crescent rolls on top of the cheese mixture and brush with egg white. Bake for 35-45 minutes until the top is golden brown. Top with glaze after cooling for 20 minutes.

Kitchen Notes:
I have made this Danish using low fat cream cheese and splenda (sugar substitute) and it was delicious! Also, the amount of filling the original recipe calls for makes a VERY heavily filled Danish. I have halved the filling using 1 package of cream cheese, 1/2 cup of sugar, 1 whole egg, and a 1/2 teaspoon of vanilla extract and it was still very good. If you use the half filling method, bake for closer to 30-35 minutes. (Notes from the presenter of this recipe.)
Pinterest recipes and pictures.

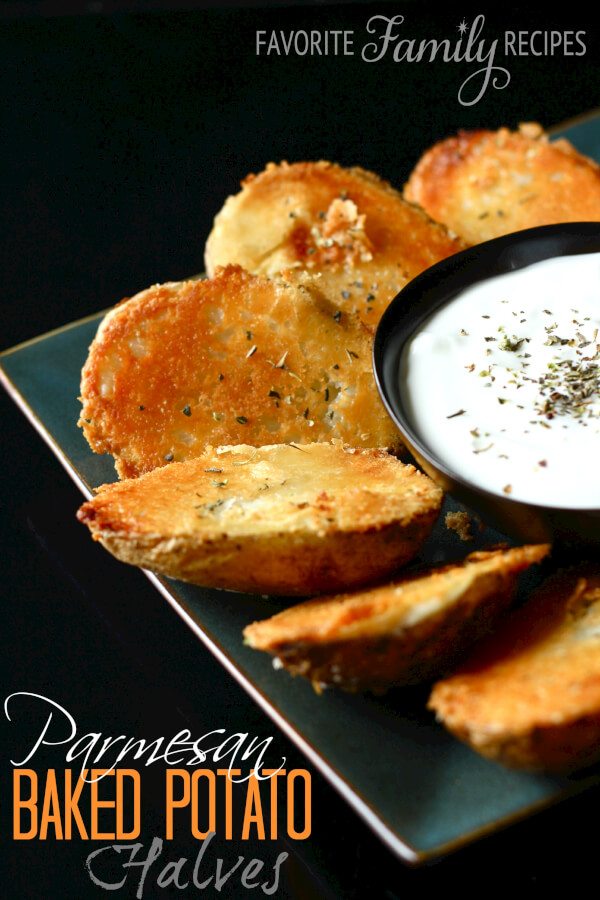
These potatoes were the hit of Sunday's main meal,  five pounds of potatoes and none were left!
 So easy too.
Parmesan Baked Potato Halves from favfamilyrecipes.com - one of our most popular recipes! #potatoes
I love these Parmesan baked potato halves, they make the perfect side dish.  Pinterest.
Parmesan Baked Potato Halves. I am making these today to go with racks of ribs.  We are celebrating Brooks being home with a 4. from a difficult year at the Citadel. From now on it will get easier, well, one can only hope.
 
Ingredients
  • 6 small potatoes, scrubbed and cut in half
  • 1/4 cup butter
  • grated parmesan cheese
  • garlic powder
  • other seasonings (to personal preference)
Instructions
  • Preheat oven to 400 degrees. Melt butter and pour into a 9x13 inch pan and spread evenly across the bottom. Generously sprinkle parmesan cheese and lightly sprinkle other seasonings all over the butter. Place potato halves face down on the butter and seasonings. Place in preheated oven and bake for 40 to 45 minutes. Cool for 5 minutes before removing from pan. Serve on a plate with a side of sour cream for dipping.
 
Lemon RecipesLemon Cookies

For the true lemon lover, these crisp cookies are the perfect treat.

Everyday Food, May 2009
  • Prep Time25 minutes
  • Total Time45 minutes + cooling
  • Yield Makes 24

Ingredients

  • 2 cups all-purpose flour, (spooned and leveled)
  • 1/2 teaspoon baking soda
  • 1/2 teaspoon salt
  • 1 tablespoon finely grated lemon zest, plus 2 tablespoons fresh lemon juice
  • 1/2 cup (1 stick) unsalted butter, room temperature
  • 1 cup granulated sugar
  • 1 large egg
  • 1 teaspoon pure vanilla extract
  • Lemon Glaze

Directions

  1. Preheat oven to 350 degrees. In a medium bowl, whisk together flour, baking soda, salt, and lemon zest. In a large bowl, using an electric mixer, beat butter and granulated sugar until light and fluffy. Add egg, vanilla, and lemon juice and beat until combined. With mixer on low, beat in flour mixture.
  2. Drop dough by heaping tablespoons, 1 inch apart, onto two baking sheets. Bake until edges are golden, 15 to 20 minutes, rotating sheets halfway through. Let cool 2 minutes on sheets, then transfer cookies to a wire rack to cool completely. Spread cookies with Lemon Glaze and let set, about 1 hour.
 

Wednesday, May 1, 2013

Think About the Things that Give you Pleasure ~


PhotoI am waxing nostalgic today, thinking about simple things that give me pleasure.  Yesterday we began dragging out the pool furniture and the plants and flowers, arranging them scrubbing the furniture, mowing the lawn and generally spending the day puttering outside.  Normally I don't like to work outdoors, but yesterday was a perfect day for it and I do like the results.  Since I have my camera's memory card stuck forever in the side of my new computer, I cannot give you pictures of this day's activity, but since you do it yourselves, find the perfect day to do it and it will be more enjoyable.                                      

It is time for the outdoor markets in Worthington and Clintonville.  The guys like to go there early on Saturday mornings and before long the strawberries will be there to greet them, oh, and the peaches.  Andy patiently stands in line waiting for a chance to bring home a big basket of juicy fruit for its many delectable dishes.

                                                                      Photo

Sunday the family gathers with some of the grandchildren home from college. Brooks had a hard (first) year at Citadel Military College. He didn't give up and he made it! We are proud of him. The college kids get out so early now days.  Maybe we did too, but everything seems to be coming faster now days. We are having steak, baked potatoes, and a special salad.  It will be the first grill out of the summer. I do not have a Big Green Egg, but I am sure the old grill will still work just fine.  Saturday, hopefully, will be a work outside day getting the rest of the acreage ready for the summer.  The weeds grow best of all, as usual. But they even look lush, green and happy this year.
           
                      Some jam & biscuit to go with your tea~~~

Breakfast outside with the newspaper and all its recipes and games; Sudoku and the two crossword puzzles start my first day of May  day.  I remember all those years when I hit the floor running and never stopped until bed time. What a pleasure life is at this point in time.

                                                       Out of all this, I miss my mother most.  If she were here, I would like to give her this bouquet for being the best mother in the world. I should have appreciated her more.

                                                
Vintage flowers are so in vogue, we just love this pretty example from our newly launched Summer collection. 

Who would you like to send thiese flowers to and why?
 
    Photo

I'd give her a big bowl of her favorite berries; how she loved them.

                                                          
Photo
 
In loving memories, a quiet meal in a little garden in Paris with my antiquing friends. Simple and elegant. 
 
 
                                                         And, how things should be:
Photo

Monday, April 29, 2013

The Big Green Egg ~

To buy or not to buy, that is the question.  The blog Mennonite Girls can Cook seems to encourage this purchase...they in fact bought two, one for camping (I'll quickly delete that ) and one for home use.  One lady bakes bread in hers.  I had not heard a word about these ceramic lined outdoor grills until I read last weeks post.  Indeed they do look like a big green egg.  The concept is based on a Japanese kamado design and I guess everything tastes better when cooked in the big green egg.


"We were in need of a new BBQ and after some research we decided to purchase a Big Green Egg, which is a ceramic kamado style cooker. Shortly after purchasing one we decided to purchase a small Big Green Egg that we could use at home and take camping and on day trips.
The Big Green Egg has amazing heat retention. Temperature control is easy to regulate and we have found that food is moister and more flavourful when cooked on the egg. It uses lump charcoal fuel which burns clean and adds a delicate wood flavour to food."

While I continued to cook and bake in the kitchen I realized that my husband was beginning to show interest in cooking on the Egg, and soon there I found that I was not the only one looking up recipes and creating recipes of my own. Let's just say the 'competition' has been very impressive and enjoyed." pictures and quotes from Mennonite Girls Can Cook (blog).


"I love kitchen gadgets and I have found that he's acquired quite a selection of gadgets for cooking on the Egg.
You've never tasted such juicy drumsticks!"
 

"The small Egg also comes along when we go RV'ing. I stir up the dough, he heats the pot and gets the Egg up to temperature. In goes the dough and out comes fresh bread. This was no knead multi grain. We also bake cinnamon buns. We enjoy when there campers stop by our site to see what's cooking and we are able to invite them for a slice of fresh bread and home made jam."

Amazon offers a Big Green Egg cookbook.

The Big Green Egg is effectively a ceramic oven with a firebox below the cooking surface. It has top and bottom vents, both of which can be adjusted to control both temperature, humidity and smoke concentrations.

The big advantage to a ceramic cooker vs. a gas or metal kettle grill is that you have amazing control over the temperature while burning fuel surprisingly efficiently. The ceramic acts as a heat ballast and the BGE is both super efficient and extremely temperature stable. Because of the design, it also tends to use burn less fuel, drawing less air and, hence, loses less moisture during the cooking process. While this also means less smoke production, the smoke tends to stay in the cooking area longer and at lower temperatures.


Specifications


  • Fast lighting- ready to cook in 10 minutes with no lighter fluid
  • Ceramic walls retain heat with accurate temperature control and no hot spots
  • Fuel efficient so there is no need to add more charcoal while cooking: unburned charcoal may be reused
  • Withstands temperature extremes from below 0 to 1800 F
  • Foods the juiciest and most succulent meals
  • The wooden mates or shelves and a metal nest or stand are included
  • Withstands temperature extremes
  • Ceramic walls retain heat with no hotspots
  • Exterior temperature gauge for internal temperature readings
  • Adjustable dampers for temperature control
  • Size: Large
  • 18" diameter cooking grid
  • 255 square inches of cooking surface
  • Weighs 140lbs
  • Note:  If it is not  put together, I am NOT buying it for sure.

    Thursday, April 25, 2013

    Not Going to Happen~


                                                                 Photo

    I have not created a difficult recipe in years.  I figure what is the point?  People get just as full on quick, easy,delicious dishes as they do on long convoluted displays with messy plate decorations.  Wipe off the plates already! I have read that cooking relaxes some people. Writing about cooking relaxes me, but actually doing it, not so much. I like cooking, but it does not relax me. Books relax me, reading about cooking relaxes me. I used to make cookies called Lady Locks that took three days to make. WHY? I made puff pastry from scratch for heavens sake...ONCE.


    This is a wall of herbs.  Isn't it fantastic? In Atlanta at their botanical gardens.

    Mexican Pizza

    Mexican Pizza

    by Trader Joes Recipes on February 23, 2012
    A tasty and easy Mexican-style pizza – two crisp tortillas filled with seasoned ground turkey, hearty beans, and then topped with chunky salsa, a three cheese blend, green onions, black olives, and diced ripe tomatoes.

    Mexican Pizza

    Mexican Pizza Recipe


    Yield: 2 Mexican Pizzas
    Prep time: 20 min | Cook time: 25 min

    Ingredients

    • 1/2 pound Trader Joe's Ground Beef or Ground Turkey
    • 1 medium onion, diced
    • 1 clove garlic, minced
    • 1 tablespoon chili powder
    • 1 teaspoon ground cumin
    • 1/2 teaspoon paprika
    • 1/2 teaspoon black pepper
    • 1/2 teaspoon salt
    • 1 15-oz can Trader Joe's Traditional Style Fat Free Refried Beans
    • 4 9-inch flour tortillas
    • 1/2 cup Trader Joe's Chunky Salsa, or your favorite salsa
    • 2 cups Trader Joe's Lite 3 Cheese Blend
    • 2 green onions, chopped
    • 2 roma tomatoes, diced
    • 1/4 cup Trader Joe's Extra Large Black Pitted Olives, sliced

    Instructions

    1. Preheat oven to 350°F.
    2. Place meat, onion and garlic in a skillet over medium heat. Cook until beef is evenly browned. Drain off grease. Season the meat with chili powder, cumin, paprika, salt, and pepper.
    3. Coat 2 pie plates with non-stick cooking spray. Place one tortilla in each pie plate and cover with a layer of refried beans. Spread half of the seasoned meat over each tortilla and then cover with a second tortilla. Bake for 10 minutes in the preheated oven. Remove from the oven and allow to cool slightly.
    4. Spread half of the salsa over the top tortillas. Top each pizza with half of the cheese, tomatoes, green onions, and olives. Return the pizzas to the oven, bake until the cheese is melted, about 5 to 10 minutes. Remove from the oven and allow to cool slightly. Slice each pizza into 4 pieces and serve

    To the doctor

    We are off to the doctor to have Andy checked out since he has had two falls.  We thought to wait until his appointment on the 20th, but aft...